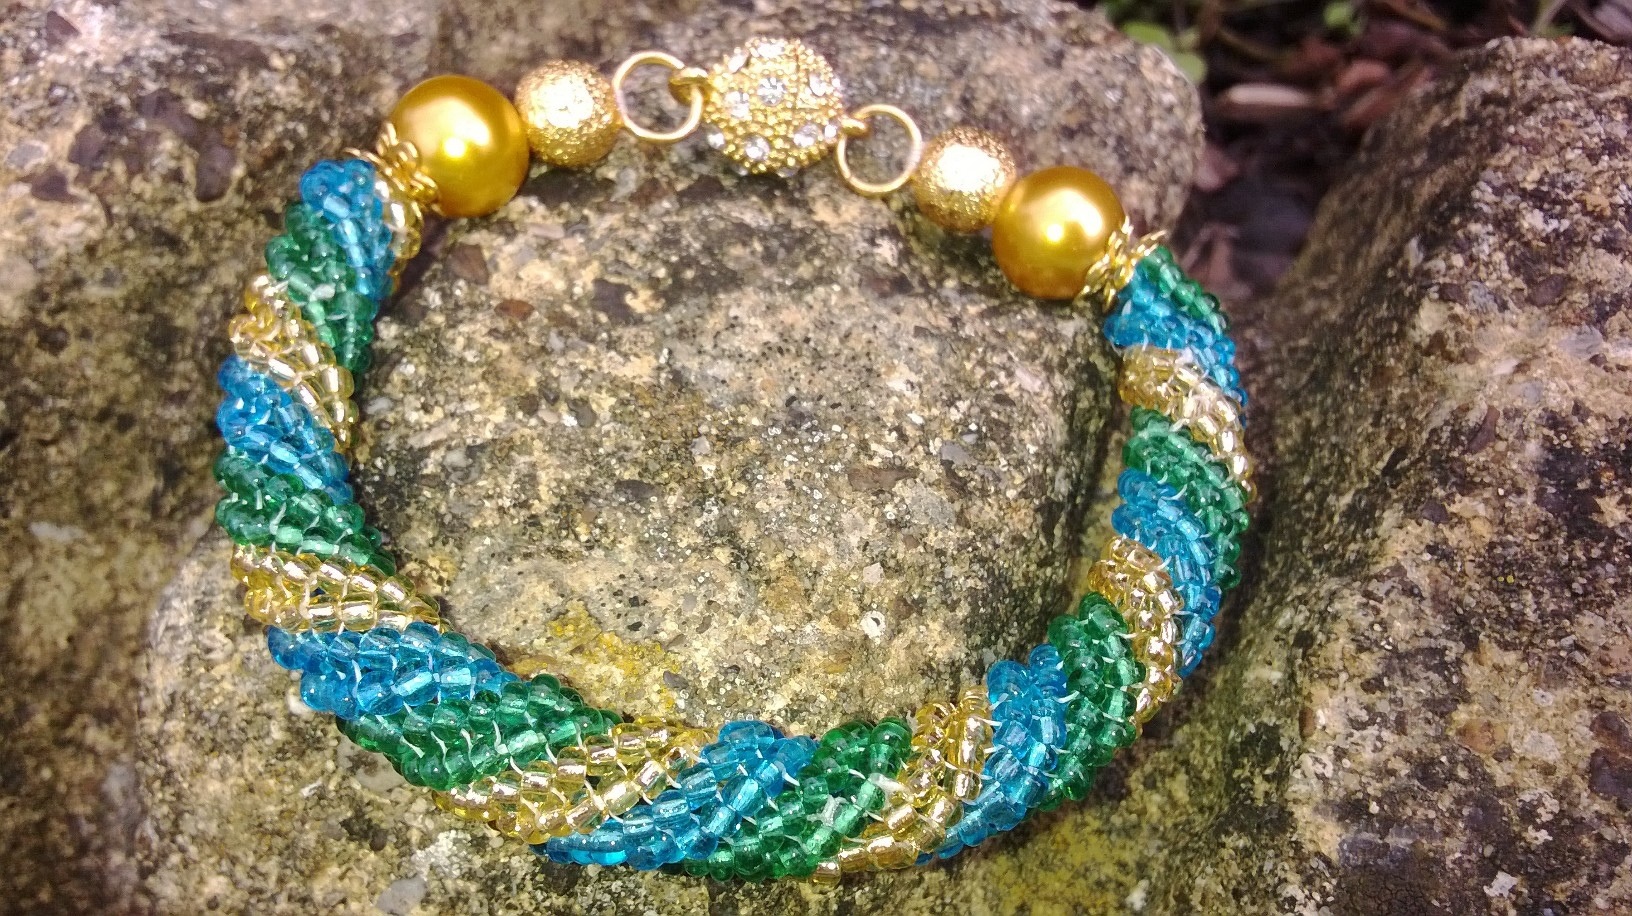
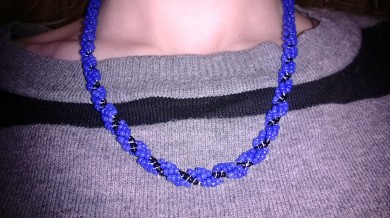
Hi everyone, I know it’s been quite a long break but I’ve been taking some time to relax, work and think of some ideas for my next post. I have decided to write a tutorial on my favourite beadweaving stitch – spiral rope stitch. I love it because it is super simple and very rewarding. Who doesn’t like spirals? Anybody can do this, even those new to beadweaving or jewellery making all together. Now I don’t know about you, but I often have to read tutorials over and over again to understand exactly what I have to do. I have tried to make this as simple as possible with as many pictures as possible but it is my first ever time writing a tutorial so go easy on me! This tutorial is for the stitch itself. The picture above shows some pieces that can be created with the stitch 🙂
What you need:
– Two colours of seed beads. You can use any sized beads you like, but depending on the size you use you will achieve a different effect. In this tutorial I will be using these silver (they will probably look more like black in my pictures) and white size 11 seed beads. I bought them from Craftylinks jewellery inside Byrkley Park Garden Centre near Burton-on-Trent if anyone’s interested. They have a nice selection of seed beads for a good price 🙂 http://www.craftylinks.co.uk/ 
It is important to know that I will be referring to the silver beads as A and the white beads as B (I know, it’s confusing in the picture above that A is on the right and B on the left but I didn’t think of this when I took the picture!) When you are choosing your own A and B beads, you should bare in mind that the A beads are the centre of the spiral, and the B beads are going to be the actual spiralling bit on the outside. You will need more B’s than A’s and you will see this colour much more prominently.
– Some beading thread. I personally love to use a thread called K.O. I think it’s great and doesn’t knot as regularly as other threads. Other popular threads include nymo and fireline. Today I randomly decided to use nymo. Like you do.

– Beading needle
– Scissors (pretty self explanatory)
– Thread conditioner such as Thread Heaven. (Optional, this prevents the thread from fraying or knotting and makes your beading life a tiny bit easier)
– Oh, and a beading mat would be useful if you’ve never done anything like this before. This stops the beads from slipping all over the place and spilling everywhere. Then again I use a beading mat and it still happens because it’s me. 😀
– The rest is down to you…
How to do it
1. Cut off a piece of beading thread (hint, make it pretty long) and thread 4 A beads (remember, in my pictures the silver beads are A) and 3 B beads (white). 
2. Pull them down the thread, but stop to leave a fairly long ‘tail’. This is so that you can tie it off at the end, or you can use the tail to fasten on findings etc.

2. Pass your needle UP through all four A beads (silver), being careful to make sure that the tail stays the same length (this part is quite fiddly.

3. Pull the thread tight (like I say, making sure that the tail stays the same length). Make sure you place your work the same way up as the picture below as the next step will be much easier to understand if you do. So the tail should be at the bottom, your 4 A beads should be on the right and the 3 B’s on the left.

4. Right, this is where it starts to get interesting. So the next thing you must do is thread 1 A bead and 3 B beads.

(well, you know… not THAT interesting yet)
5. Now push those beads down the thread so that they sit right next to the ones you have already threaded, just as shown in the picture below. So the tail is still at the bottom, the 3 B beads on the left and the 4 A beads on the right with now one more A bead and three B beads sitting on top of them. This next step is the whole basis of the stitch basically.

6. Now, hold that last A bead you added in place so that it sits with the other A beads. You can let the B beads slide back down the thread if you wish, whatever works best for you. WIth this stitch you will always be passing the needle up through the last four beads added, which will always be three already threaded A beads and the one you just added. If that makes sense. The idea is to keep adding three B beads to the outside, but going up a bead each time so that a spiral is created. Again, if that makes sense. It does in my head. So what you are going to do is pass your needle through the last four A beads, NOT the bottom one.

7. Pull everything tight (you may still have to be conscious of making sure you don’t pull it so tight that it shortens the tail). Arrange your work like the photo below. The tail is still at the bottom, there are five A beads to the right (its actually really the middle of the spiral) and two lots of three B beads resting next to each other on the left.

8. And that… is basically the stitch. It doesn’t look like anything yet, but let’s do it again. Thread 1 A bead and 3 B beads again.

9. Push them down the thread so that they lay against your work.

10. Hold the A bead you just added in place, then pass the needle UP through the last three A beads AND the one you just added (so the last four really)

11. Pull your thread tight and it should look like this!

12. Now that’s starting to look as though it will turn into a spiral soon. Continue doing the same step, over and over. Adding one A and three B’s, holding the A in place and passing your needle up through the last four A’s. Then after a while you should have created something at least resembling a spiral which can be turned into any piece you like. I personally like to make bracelets out of this stitch. I made loads for my last craft fair of varying sizes and colours and they were my biggest sellers. Hey, everyone loves a nice spiral.
PICTURES OF SPIRALS:

I hope you enjoyed the tutorial and it was helpful to somebody out there! I hope to post some more tutorials soon and hopefully create some more pieces and post them too. I’ve been pretty busy recently, but I’m trying my best to keep this blog going! Feel free to ask any questions or give me some constructive criticism in the box below. I’d like to improve for next time. 🙂 Hope you’re all smiling! Keep beading!